VPN — Windows
Windows includes a built-in VPN client. No third-party app required.
Prerequisites
You need a VPN user account and credentials in Dashlane before starting. See the VPN overview for details.
UI language
If Windows is set to Danish, menu labels appear in Danish. The table below maps both languages where it matters.
Setup
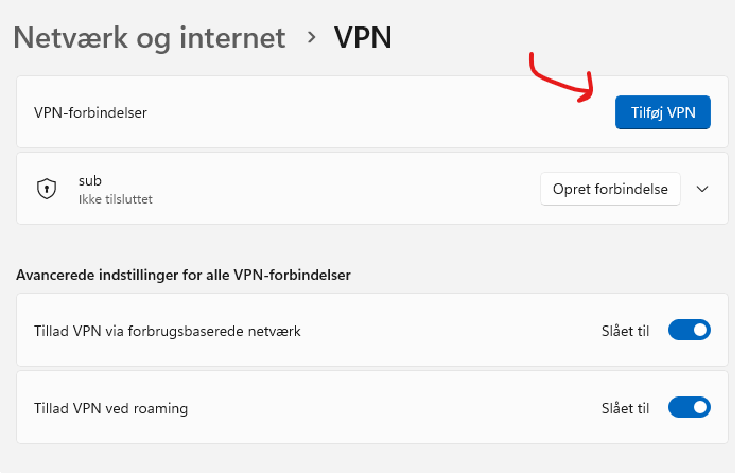
1. Open Settings → Network & Internet → VPN → click Add VPN (Tilføj VPN).
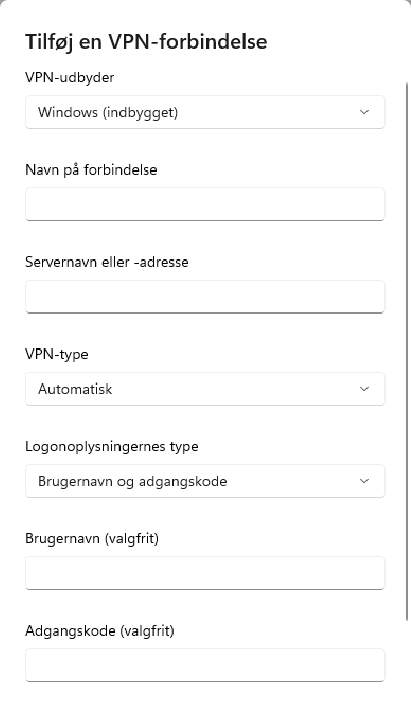
2. Fill in the connection details and click Save (Gem):
| Field (EN) | Field (DA) | Value |
|---|---|---|
| VPN provider | VPN-udbyder | Windows (built-in) |
| Connection name | Navn på forbindelse | Any name you like |
| Server name or address | Servernavn eller -adresse | 87.116.13.2 |
| VPN type | VPN-type | Automatic (Automatisk) |
| Sign-in info type | Logonoplysningers type | Username and password |
| Username | Brugernavn | (Dashlane → VPN credentials) |
| Password | Adgangskode | (Dashlane → VPN credentials) |
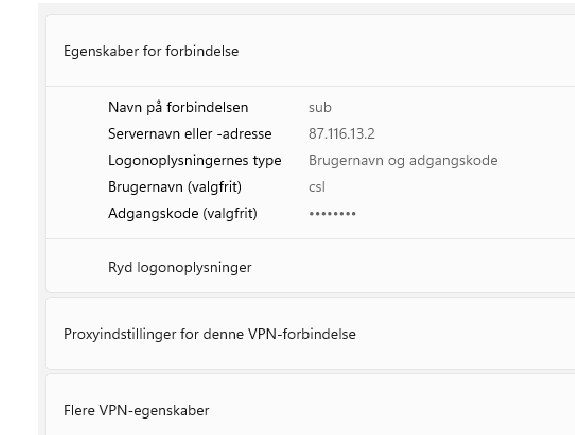
3. Back in the VPN list, expand your new connection → click Advanced settings (Avancerede indstillinger).

Click Edit (Rediger) next to More VPN properties (Flere VPN-egenskaber).
In the Security tab, confirm the following:
| Setting | Value |
|---|---|
| VPN type | L2TP/IPSec with pre-shared key |
| Authentication | Allow these protocols → MS-CHAP v2 only |
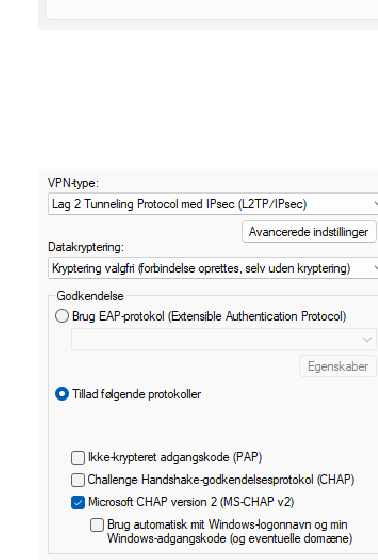
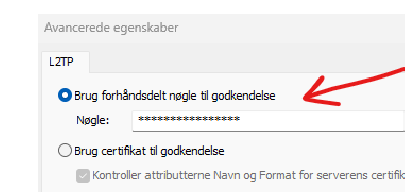
4. Click Advanced settings (Avancerede indstillinger) next to the VPN type dropdown, and enter your Shared Secret (Dashlane → VPN - Shared Secret) in the pre-shared key field.
Connecting
Go to Settings → Network & Internet → VPN, select your connection, and click Connect (Opret forbindelse).